|
I've become a big Fan of Appliqués in many Years. In this Tutorial I want to show you what you can accomplish with this simple Sewing Technique. You can also find a similar Tutorial about this Technique used as Pattern here: BORDER TUTORIAL Another Tutorial about Appliquè will follow also. 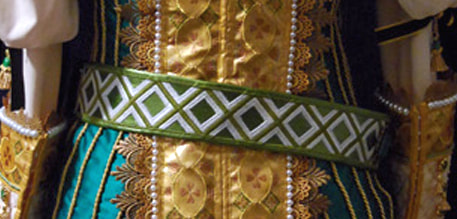 How to work Step by Step: STEP 1 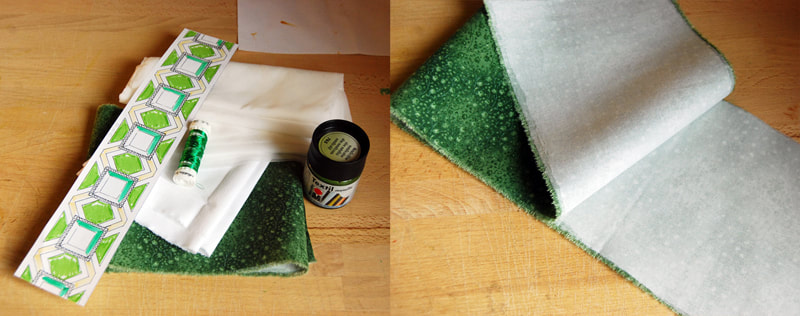 What Materials do you need: - Pattern/ Reference - Fabric and Thread - Interfacing /Interfacing double-sided and a Iron - Sewing mMshine/ Needle - Fabric Paint Now as in Border Tutorial reinforce your Fabric with Interfacing. It Interfacing shouldn't come off. Step 2 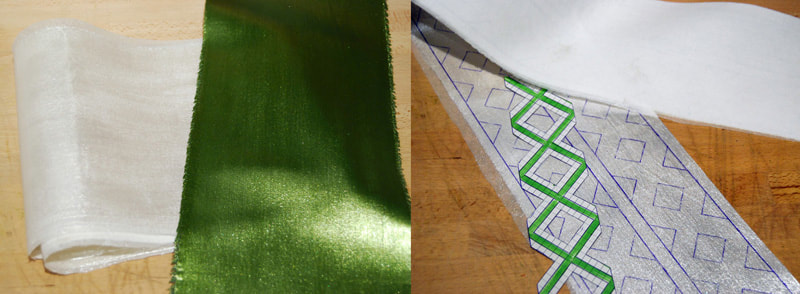 Paint the Colour on it next. Here I used metallic-olive and metallic-white. One Color per Fabric. Use a Copy of your Pattern and draw all the Lines on the Fabric. Use a Pen that you can see well, but doesn't stand out too much from the Fabric or Paint. Otherwise you can still see the Drawing after Sewing. (NEVER cut the Original!) Tip: You can also draw the Pattern on the Back and sew in with a straight Stitch as an Orientation before you turned the Fabric and actually Sewn. STEP 3 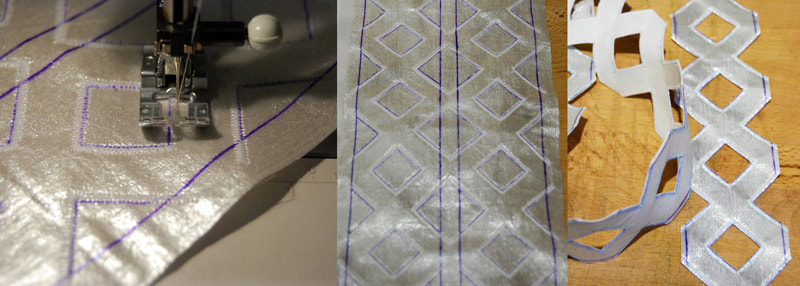 You can start stitching the first Round of the Frame with Zigzag like this Example. Now our prolonged Step: Cut it out carefully. In this case you may not cut the Seam, otherwise the Thread loosen. Cut off all the Fabric Threads, that stick out. STEP 4 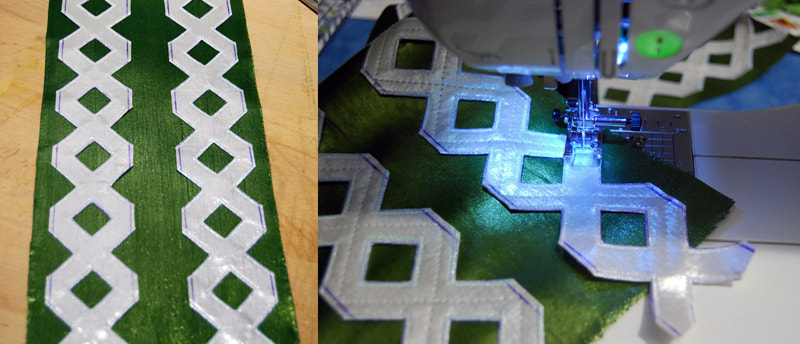 Place the white Pattern on the green Fabric. You can clue it or get pin it. When you use double-sided Interfacing just put it ironed, then it will not slip. Sew a second Round with the Zigzag along the white Pattern. You can use different kind of Threads, like normal, shiny or metall Thread to get a speciel Effect. STEP 5 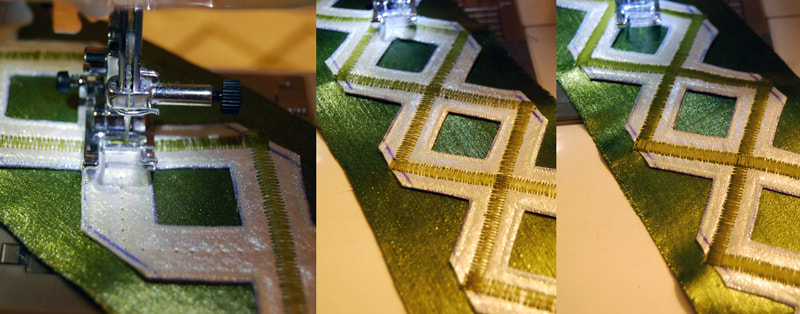 With a decorative green Thread I repeat twice the Zigzag Stitch and sew along the Line you can see from Step 4 I sew to fix the white Pattern on the green Fabric. STEP 6 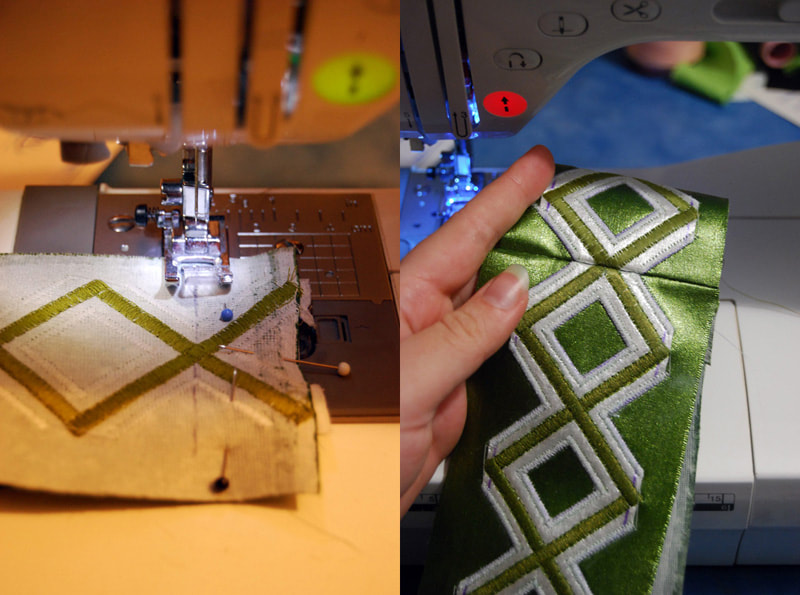 It may happen that you have to sew several Pieces of Fabric together. Please note that the Pattern is not interrupted (if possible). STEP 7 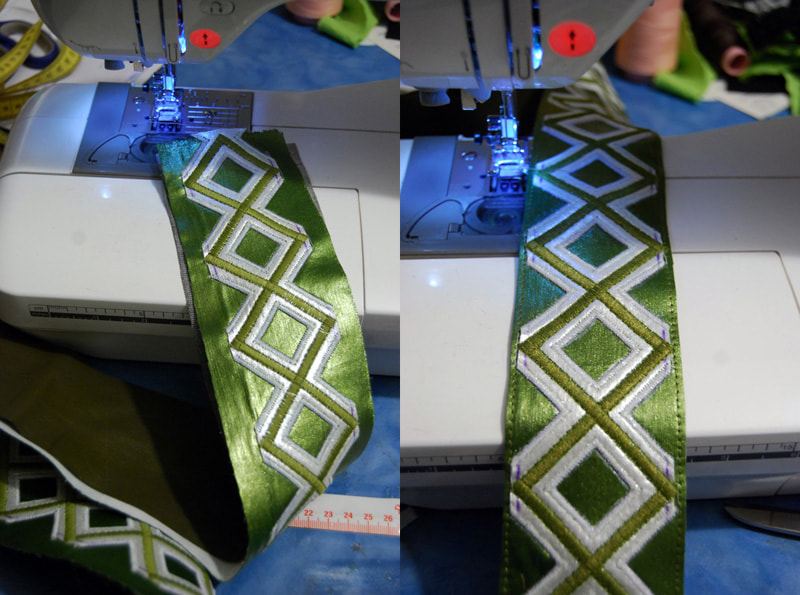 I found old green Pleather in my Fabric Wardrobe. Perfect for my Belt. You can use Pleather or a solid Fabric as a Backside. Cut the Pleather in the same Size as the Color Fabric and sew it all together. STEP 8 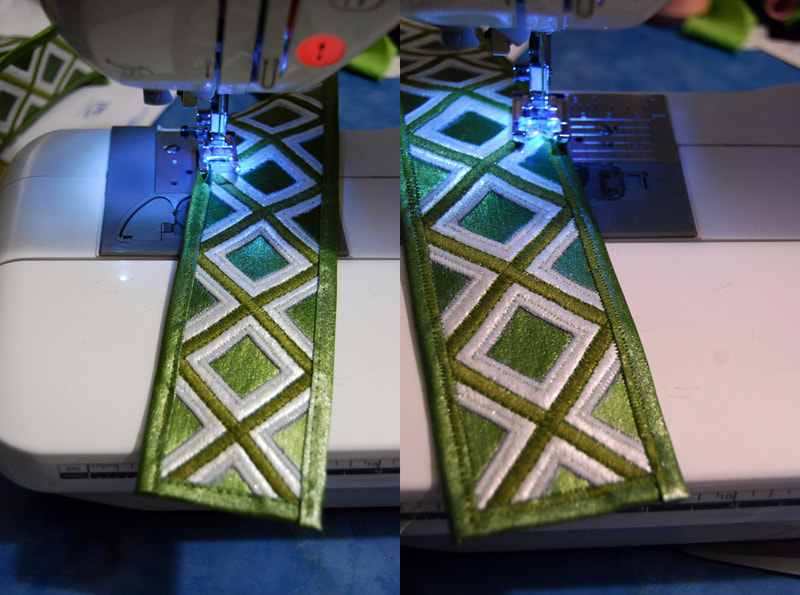 With a Bias Tape is the Belt "closed" and decorated. You can buy them in a Store or make/paint them by yourself. As a little Extra, I stitched the Bias Tape with Zigzag. 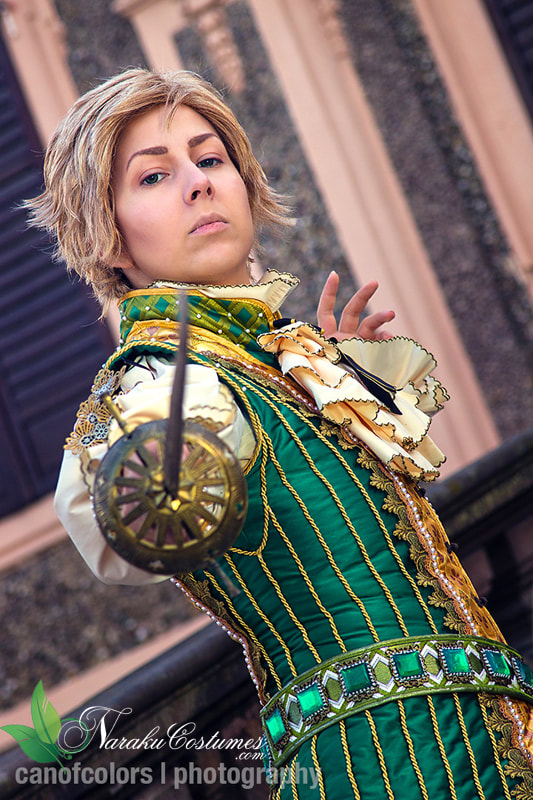
0 Comments
Leave a Reply. |